Welcome to our guide on how to clean a Keurig coffee maker! Whether you enjoy your morning coffee at home or rely on your Keurig machine in the office, regular cleaning is essential for maintaining its performance and ensuring delicious, fresh-tasting coffee every time. In this article, we’ll walk you through everything you need to know about cleaning and maintaining your Keurig in 30 minutes or less. Let’s dive right in!
How To Clean and Descale a Keurig in 30 Minutes or Less
Why Cleaning Your Keurig is Important
Cleaning your Keurig is important for maintaining the quality and taste of your coffee. Over time, mineral deposits can build up in the water reservoir and on the needles, affecting the performance of your brewer. Regularly cleaning these areas with a damp cloth and descaling solution helps to remove buildup and ensure a smooth brewing process. Don’t overlook this essential step in keeping your Keurig functioning at its best.
Before You Start
– Unplug the Keurig machine for safety during the cleaning process.
– Remove any K-Cups or pods from the brewer.
– Damp a cloth for wiping down the exterior of the Keurig machine.
– Descaling solution to remove mineral buildup in the base and water reservoir.
Cleaning Supplies You’ll Need
Vinegar, dish soap, descaling solution, and a soft cloth are key cleaning supplies you’ll need to properly clean your Keurig coffee maker. White vinegar is an excellent natural cleaner that can help descale the machine and remove built-up mineral deposits. Dish soap is perfect for gently washing the exterior of your Keurig, while a soft cloth ensures a streak-free finish. With these basic items on hand, you’ll be well-equipped to keep your Keurig sparkling clean and ready for brewing delicious cups of coffee at any time.

Cleaning the Exterior
Wipe down the exterior of your Keurig brewer with a damp cloth to remove any dirt or dust that may have accumulated. Make sure to reach all areas, including the base and buttons.
Clean the drip tray and pod holder separately by removing them from the machine. Wash them with warm soapy water, rinse thoroughly, and dry them completely before placing them back into the brewer.
Remember to dry all parts of your Keurig thoroughly after cleaning to prevent moisture buildup that could lead to mold or mildew growth.
Cleaning the Water Tank
1) Empty and rinse out the water tank
To clean your Keurig’s water tank, start by removing it from the base of the machine. Empty any remaining water into the sink and give it a thorough rinse with warm water.
2) Soak removable parts in warm soapy water
Take apart any removable parts of the water reservoir, such as the lid or filter holder, and soak them in a bowl filled with warm soapy water. This will help to loosen up any built-up residue or stains.
3) Scrub residue or stains with a soft brush
After soaking, use a soft brush (such as an old toothbrush) to scrub away any remaining residue or stains on the removable parts of the water reservoir. Be gentle yet firm to ensure effective cleaning without causing any damage.
Keep in mind that cleaning your Keurig’s water tank regularly is crucial for maintaining optimal performance and brewing quality coffee.
- Empty and rinse out
- Soak removable parts in warm soapy water
- Scrub residue or stains with a soft brush
Cleaning the Keurig Needle
Locate and clean the needle carefully by removing the water tank and flipping over the Keurig brewer. Use a paper clip to clear any clogs that may be blocking the needle, ensuring it is completely free of debris. Then, rinse it with warm water after cleaning to remove any remaining residue.
Descaling Your Keurig
- Prepare the descaling solution according to the instructions provided. For a more natural clean, use a solution of equal parts water and vinegar as homemade descaling solution. Ensure that you have the correct amount of solution mixed with water before proceeding.
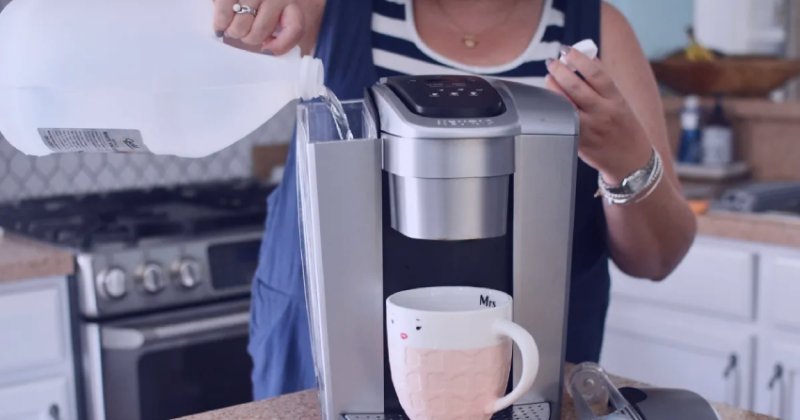
- Pour the descaling solution into the water reservoir of your Keurig brewer. Be careful not to overfill, as this may cause spills or damage to your machine.
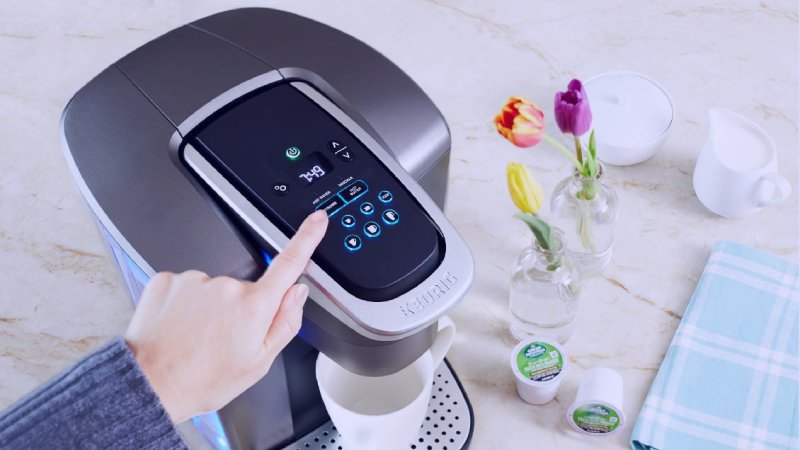
- To fully descale your Keurig, run multiple cycles of just hot water through your brewer. This will help flush out any remaining residue and keep your machine clean.
By regularly descaling your Keurig, you’ll help maintain optimal performance and prolong the life of your Keurig machine.

Regular Maintenance Tips
Cleaning After Each Use
To keep your Keurig machine running smoothly, it’s important to clean it after each use. Start by removing the used K-Cup and emptying any remaining water from the tank. Then, wipe down the exterior with a damp cloth and remove any coffee grounds or debris from the K-Cup holder. Finish by running a brew cycle with just water to rinse out any leftover residue.
- Wipe down the exterior of the Keurig with a damp cloth.
- Remove and wash the removable parts, such as the drip tray and water reservoir.
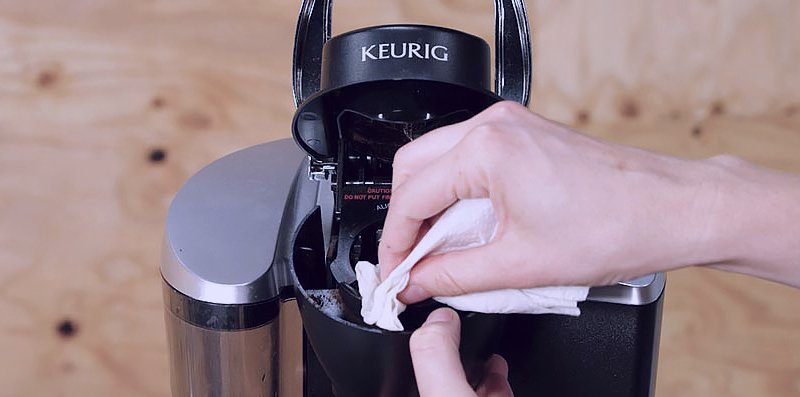
- Use a clean, damp cloth to wipe away any coffee residue from around the K-cup holder.
Monthly Deep Cleaning Routine
In addition to daily cleaning, it’s recommended to give your Keurig machine a deeper clean once a month. Consistently deep cleaning your Keurig on a monthly basis will keep it in top shape and ensure you get a fresh cup of coffee every morning.
- Descale your Keurig by running a descaling solution or vinegar through it
Over time, mineral deposits can build up in your Keurig machine, affecting its performance and the taste of your coffee. To combat this, run a descaling solution or homemade solution of vinegar and water through your machine once a month to remove any scale and keep it running smoothly. - Clean or replace the water filter if necessary
The water filter in your Keurig helps to improve the taste of your coffee by removing impurities from the water. Check the condition of the filter regularly and clean or replace it as needed to ensure optimal filtration and delicious brews. - Remove and soak all detachable parts in warm soapy water for thorough cleaning
To deep clean your Keurig, take apart all removable components such as the drip tray, K-cup holder, and tank lid. Soak them in warm soapy water for a few minutes before scrubbing gently with a soft brush or cloth to remove any residue or buildup that may have accumulated over time.

Troubleshooting Common Issues
Clogged Needles
Removing and cleaning the K-Cup holder is an essential step in unclogging the needles. Gently detach the holder from your Keurig machine and rinse it thoroughly with warm soapy water. Allow it to air dry completely before reattaching.
To unclog the needles, grab a paperclip and carefully insert it into each needle hole, gently moving it back and forth to dislodge any debris or coffee grounds that may be blocking them.
Running water through the needle system can also help clear out any remaining clogs. Simply fill a cup with clean water, place it under the brew head, and run a few cycles of just hot water through your Keurig machine until no more debris comes out.
Remember, regular maintenance like this will keep your Keurig running smoothly for countless cups of delicious coffee!
Slow Brewing
Descaling your Keurig machine regularly is essential for preventing slow brewing. Over time, mineral buildup in the water tank can affect the flow of water through the machine, resulting in a slower brewing process. To avoid this issue, make sure to descale your Keurig machine every few months using a descaling solution or a mixture of vinegar and water.
Another factor that can contribute to slow brewing is mineral buildup in the water tank. Minerals from the water can accumulate over time and clog up the system, causing slower extraction of coffee or tea. Regularly checking for any signs of mineral buildup and cleaning it out will help maintain optimal performance.
Cleaning or replacing the water filter is another important step in ensuring fast and efficient brewing with your Keurig machine. A dirty or worn-out filter can restrict water flow, leading to slower brew times. Cleanse it regularly according to manufacturer instructions or replace it if necessary to keep your coffee maker running smoothly.
By following these simple steps – descaling regularly, checking for mineral buildup, and cleaning/replacing filters – you’ll be able to enjoy speedy brews from your Keurig without any delays.
Strange Taste or Odor
If you’re experiencing a strange taste or odor coming from your Keurig coffee maker, there are a few simple steps you can take to remedy the situation:
- Deep clean your Keurig by running a descaling solution or a mixture of vinegar and water through the machine.
- Flush out any remaining vinegar by running fresh water through.
- Consider using filtered or bottled water instead of tap water for better-tasting coffee.
Note: Remember to always consult your specific model’s manual for proper cleaning instructions before attempting any troubleshooting steps mentioned here.
By following these steps, you can ensure that your Keurig is clean and free of any strange tastes or odors, allowing you to enjoy delicious coffee every time.