How to Clean Vinyl Plank Flooring – Expert Tips and Tricks


    Discover the most effective everyday tips on how to clean vinyl plank flooring to ensure long-lasting shine and longevity!

    Vinyl plank flooring is becoming a popular option for many homeowners and has made a name for itself as being one of the most resilient flooring types on the market. While it’s easier to clean than traditional hardwood floors, your vinyl flooring still needs TLC to keep it in the best shape possible. In this article, we’ll explore how you can clean your vinyl plank flooring by investing in the right products and creating a regular cleaning schedule. 

    How to Clean Vinyl Plank Flooring - Expert Tips and Tricks

    Choosing the Right Cleaning Products

    Choosing the right cleaning products for your vinyl plank flooring can be tricky—with so many options on the market, you may not know where to start. Products that get rid of dirt while gently preserving the floor will give you impeccable cleaning results without compromising your vinyl’s longevity. 

    Identifying the Recommended Cleaning Products

    Understanding which cleaning products to use on your vinyl floors is essential when working to maintain their durability and shine. The best source of this information is often the floor manufacturers themselves. Many vinyl flooring manufacturers suggest specific cleaning solutions that are designed to both cleanse and ensure the longevity of their flooring products. Here are a few ways to choose the right cleaning products:

    • Floor manufacturer’s recommended cleaner – carefully check the labels of cleaning products to match with the floor manufacturer’s suggestions.
    • Mild soaps – if a specific cleaner isn’t recommended, a gentle soap free of harsh chemicals can be a good choice.
    • Diluted white vinegar – when used in moderation, this natural cleaner can effectively sanitize your vinyl floors.
    • PH-neutral floor cleaner – preserves the color and sheen of the vinyl.
    • Commercial vinyl floor cleaners – specially formulated, these provide optimal cleaning without damage.

    Avoiding Harsh Chemicals

    Abrasive cleaners can strip vinyl floors of their shine and make them more susceptible to damage. Therefore, avoiding these harsh substances when cleaning your vinyl plank flooring is best.

    Instead, opt for natural alternatives to chemical-laden cleaners, such as combining an equal solution of white vinegar and warm water. 

    Preparation for Cleaning

    Before initiating the cleaning process, you’ll need to prep the floors to ensure they’re ready for a deep clean. Preparing your floors before starting the cleaning process will give you the best results possible.

    Clearing the Floor

    The first crucial step in cleaning vinyl plank flooring is clearing the floor. This preparation strategy removes all obstacles, providing an unhindered cleaning surface.

    Relocating furniture and smaller items prevents them from being a hindrance and allows for a thorough, uncompromised cleaning.

    Sweeping and Vacuuming

    Sweeping and vacuuming are vital in the upkeep of vinyl plank flooring. These initial cleaning steps whisk away loose dirt and dust, preventing them from scratching your floor’s surface over time.

    Vacuuming efficiently on vinyl is a game of finesse. Ensure the beater bar is off to avoid scratching and use a soft-bristle brush attachment. This way, the floor is treated gently, keeping your vinyl planks in pristine condition.

    How to Clean Vinyl Plank Flooring - Expert Tips and Tricks

    How to Clean Vinyl Plank Flooring

    Having swept and vacuumed the floor, the next step is to mop the vinyl flooring to give it a glistening shine! 

    Beyond just spot cleaning, adept vinyl floor upkeep involves regularly sweeping or vacuuming to prevent grit buildup, scheduling routine comprehensive cleanups, and taking precautions to guard against potential damage from furniture. These intentional practices will keep your vinyl plank flooring shining for years to come.

    Mopping with Warm Water and Mild Detergent

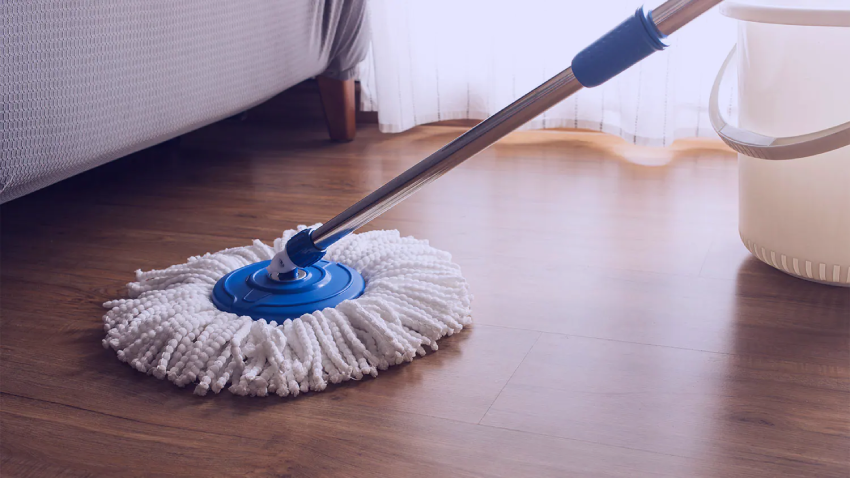
    To properly mop your vinyl plank flooring, you’ll need to utilize a mix of warm water with mild detergent. Doing so will give it a gentle clean with a glossy finish.

    1. Fill a bucket with warm water. The warmth will help loosen dirt that may have adhered to the floor.
    2. Incorporate a mild detergent into the water. For most detergents, a small squirt or a couple of tablespoons will suffice. 
    3. Use a soft mop or a microfiber mop to avoid scratching the surface of your vinyl plank flooring.
    4. Soak the mop into the soapy solution, then wring it out so it’s damp, but not dripping wet.
    5. Mop the floor, paying particular attention to heavily soiled areas. 
    6. Rinse your mop often and change your water when it becomes too dirty. Never let puddles of water sit on the floor.
    7. Lastly, rinse the mop in clean water and go over your floors once more to ensure no soap residue remains.

    Removing Stubborn or Sticky Stains

    Adhesive marks or sticky stains on your vinyl plank flooring are an unwelcome sight. But with the right items and techniques, you can triumph over them effectively.

    1. Apply a small amount of dish soap diluted in warm water to the troubled area.
    2. Allow it to sit for a few minutes to loosen the sticky residue.
    3. Wipe away with a soft, damp cloth ensuring to work gently to protect the finish of your vinyl floor.
    4. Rinse the area well to remove any leftover soap and pat it dry using a clean, dry towel.
    5. If the residue is stubborn, use a white, non-abrasive scrub pad along with the soap solution. Rub gently until the stickiness is removed.

    Regular Maintenance Tips

    For flooring that always looks its best, regular maintenance of your vinyl surface is crucial. This includes not only sweeping and mopping, but also taking steps to prevent grit and dirt buildup.

    Who knew maintaining vinyl floors could be this simple? Make it a habit to schedule regular cleaning and, when done correctly, you’ll be amazed how your vinyl flooring maintains its fresh and clean appearance over time. Remember, a well-cared floor is a floor that lasts.

    Preventing Dirt and Grit Buildup

    Tackling dirt and grit problems starts with taking proactive measures. Place doormats at every entrance to trap outside grime and dirt before they land on your vinyl floor. Taking shoes off at the entrance can also keep abrasive dirt and grit from being tracked in.

    Scheduling Regular Cleaning

    Keeping your vinyl plank floor at its best comes down to a carefully organized cleaning schedule.  Create and schedule a regular cleaning routine to keep your flooring in top shape. Not leaving too much time between cleanings prevents the buildup of dirt and stains, extending the floor’s lifespan.

    Remember to incorporate heavy-duty cleaning sessions into your routine as well. Even when you regularly sweep and mop, perform an intensive clean periodicallya strategy key to keeping your vinyl sparkling, fresh, and looking its best.

    Protecting the Floors from Furniture

    Furniture can be a foe to your vinyl flooring if not handled carefully. Heavy pieces, when dragged or pushed, can cause unsightly scratches or even gouge your beautiful vinyl. Always lift furniture or use protective pads under the legs to mitigate potential damage.

    Furniture pads or coasters evenly distribute the weight and prevent any sharp edges from denting the surface. 

    Don’t underestimate the impact of routinely moving your furniture either! Slight shifts can prevent constant pressure on one spot, helping to avoid any indentations. A little rotation goes a long way in preserving the pristine condition of your vinyl plank flooring.
    How to Clean Vinyl Plank Flooring - Expert Tips and Tricks

    Special Care for Vinyl Planks with a Protective Layer

    Caring for your flooring requires more than just regular cleaning. When it comes to vinyl planks with a protective layer, you’ll have to use specific cleaning agents that are gentle yet effective, ensuring that the protective finish remains intact. 

    Avoiding Abrasive Scrubbing Techniques

    While you may be tempted to scrub harder on tough-to-clean stains, abrasive scrubbing techniques may leave scratches or damage the protective layer of your flooring, hence it’s wise to stay clear of these methods.

    Instead, use a soft cloth or mop along with recommended cleaning agents to keep your vinyl plank spotless without scratches.

    Applying a Protective Finish

    Shield and Shine will significantly extend the life of your vinyl flooring. The protective finish offers resistance to scratches, stains, and excess moisture while adding shine, and improving the overall look of your floor.

    The key to applying Protective Finish is preparation. First, thoroughly clean the floor, ensuring there is no dirt or residue. Then, apply the Protective Finish using a gentle mop and work in sections to ensure even coverage.

    How to Clean Vinyl Plank Flooring - Expert Tips and Tricks

    Frequently Asked Questions

    1. How often should I clean my vinyl plank flooring?

    It is recommended to clean your vinyl plank flooring at least once a week to maintain its appearance and durability. However, the frequency of cleaning may vary depending on the amount of foot traffic and the level of dirt and debris in your home.

    2. Can I use a steam mop to clean vinyl plank flooring?

    No, it is not recommended to use a steam mop on vinyl plank flooring. The high heat and moisture from the steam can damage the vinyl and cause it to warp or peel. 

    3. Should I use a sponge mop or a microfiber mop for cleaning vinyl plank flooring?

    It is recommended to use a microfiber mop for cleaning vinyl plank flooring as it is gentle and effective in removing dirt and debris without causing any damage.

    4. Does vinyl plank flooring require waxing or polishing?

    No, vinyl plank flooring does not require waxing or polishing. It is designed to be low maintenance and typically has a protective layer that eliminates the need for additional treatments.